Weekend Makeover: Your Guide to Easy Epoxy Resin Garage Flooring
Imagine your garage floor transforming from stained, cracked concrete into a glossy, chemical-resistant showpiece—all without the need for heavy grinding or professional help. For DIYers and contractors alike, epoxy resin flooring offers the perfect blend of durability and aesthetic appeal.
At EpoxyETC, we've helped thousands achieve pro-level results with our simplified systems. Whether you're a homeowner seeking a garage makeover or a contractor expanding your services, this guide unlocks the stress-free mastery of epoxy resin garage flooring.
Why Choose Epoxy: The Unbeatable Garage Floor Upgrade
Epoxy isn't just pretty—it's practically indestructible. Compared to bare concrete or peel-and-stick alternatives:
| Feature | Epoxy Floor | Peel-and-Stick Tiles | Concrete |
|---|---|---|---|
| Durability | Resists chemicals, impacts, and 8,000+ PSI pressure. | Prone to tearing/peeling | Prone to surface damage or chemical hazards, 3-5,000+ PSI resistance. |
| Lifespan | With proper care, guaranteed protection for over 10 years. | 2-5 years | Several decades, but requires more maintenance due to lack of protection |
|
Customization |
Polymer flake, quartz sand | Limited patterns | Extremely limited |
Minimal Grind Epoxy Resin Flooring Installations for Garages
EpoxyETC's experienced contractor team has found that there are some simple, effective ways to achieve a beautiful, high-performance epoxy resin installation at home, without the headaches.
It should be noted that the most painless installation method assumes a relatively clean and suitable concrete foundation, which is not always the case. As always, assess each job on its own merits.
Here are some of the necessary tools you'll need:
-
Application Tools: Squeegees, paint rollers, painter's tape, and more. Don't forget your spiked shoes and safety gear!
-
Self-Leveling Concrete: Ideal for uneven surfaces (apply directly over minor cracks).
-
Epoxy Primer or Moisture Barrier Coating: A quality epoxy primer or moisture barrier coating sets the foundation for a lasting finish. Moisture barriers are ideal for garage floors, helping prevent peeling or bubbling. Choose based on your concrete’s condition.
-
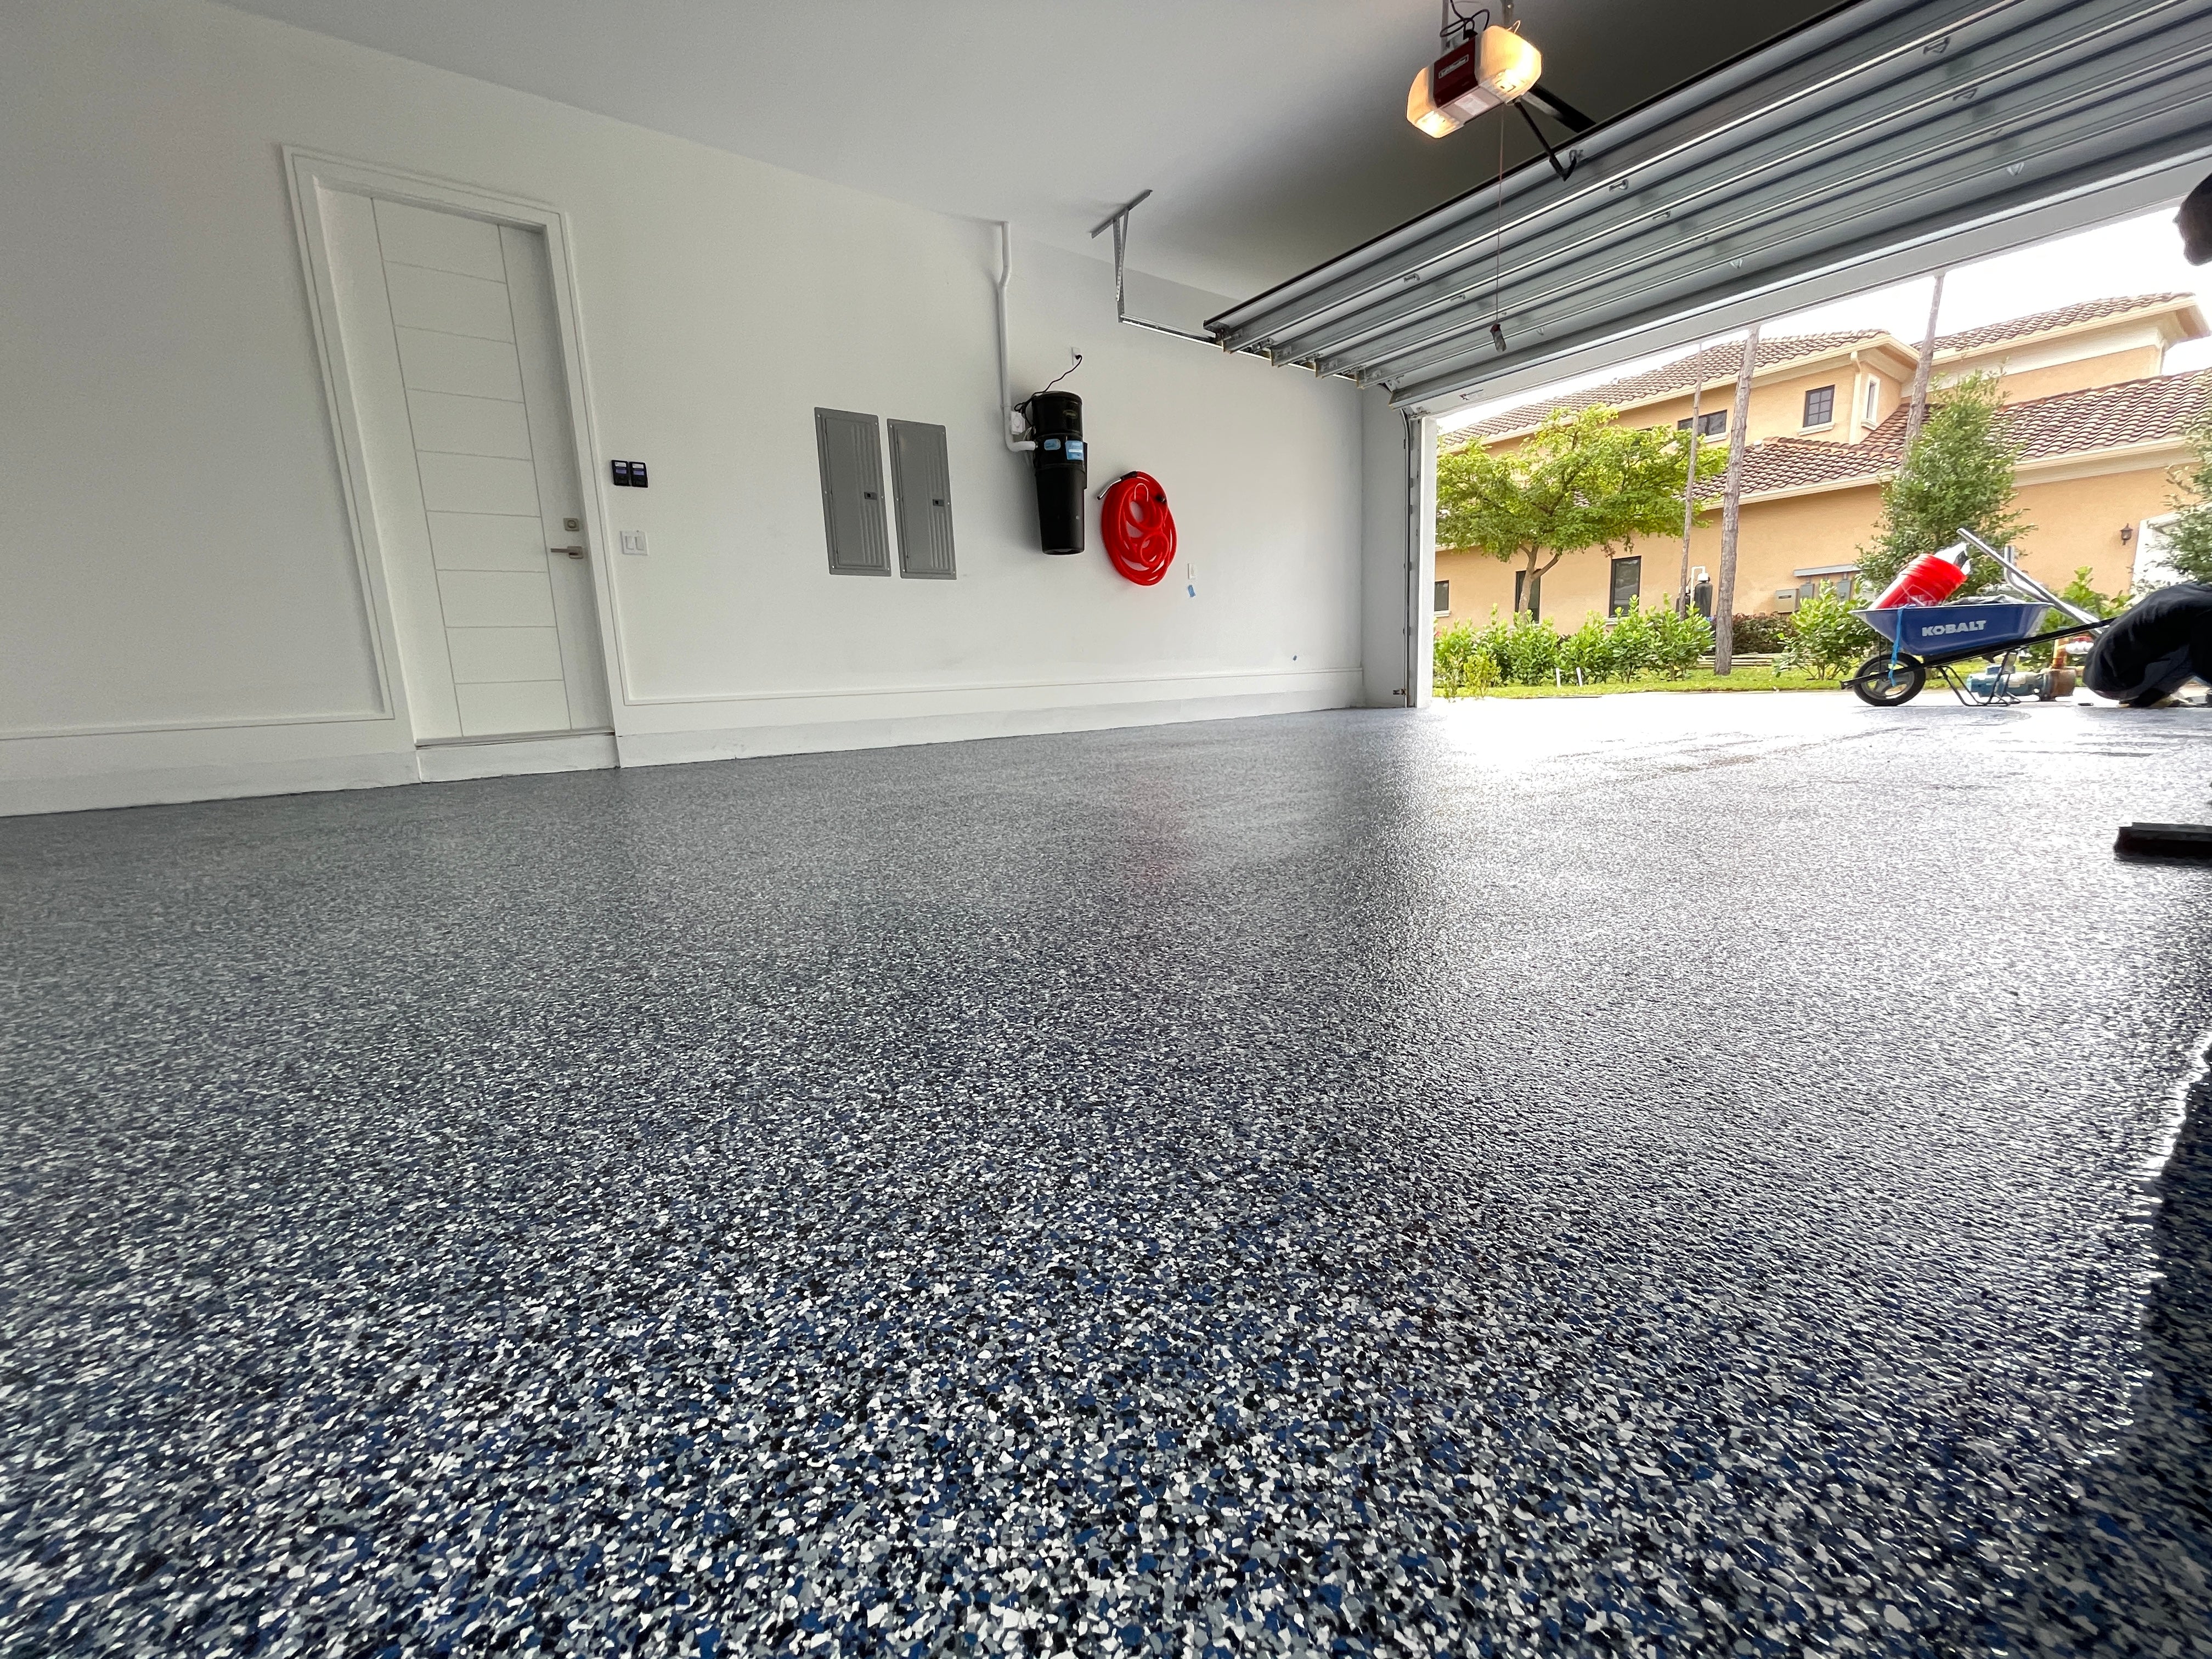
Decorative Finish of Choice: Your preferred flake or quartz sand creates a seamless floor-to-wall edge for better durability and easier cleaning—great for garages, kitchens, and industrial use.
-
(Optional) Epoxy Wall & Cove Base: Cove base creates a seamless floor-to-wall edge for better durability and easier cleaning—great for garages, kitchens, and industrial use.
-
Angle and Handheld Grinders: For the vast majority of garage projects, an angle grinder is all you'll need to fix any imperfections and prep your floor.
-
Polyaspartic Topcoat: A fast-curing, UV-resistant topcoat that provides superior durability, chemical resistance, and a glossy finish. Essential for protecting and sealing decorative coatings like flake or quartz systems.
- (Optional) Garage Floor Grinder: If you're a contractor looking to make the perfect floors time and time again, a professional grinder will take your prep to the next level.
Your 2-Day Epoxy Garage Makeover: Step-by-Step
While it's possible to accomplish a whole floor in a day with certain types of coating systems, we recommend taking things a little slower. Especially if it's your first big epoxy resin flooring project! Rushing is often the best way to fail, so avoid rushing. Our guide is built to give you all the time you need to get the best results the first time through.
Day 1: Prep and Prime (6+ Hours)
-
Clear and Clean: Remove everything from your garage for a clear working area. Sweep or use a shop vac to remove dust and dirt particles. Then, mop with the Xtreme Clean Concrete Cleaner or a mild cleaning solution of your choice. Be thorough! Preparation is the most often overlooked part of any flooring process. Be sure to let the floor dry completely before moving on to the next step to help minimize moisture buildup. Do not acid etch!
-
Sand or Grind: Inspect the surface for coatings or uneven areas. Then sand or grind to remove any coatings, contaminants, and open the concrete. Vacuum thoroughly to prep for the next step.
-
Repair Cracks and Prepare Concrete: Use a concrete repair solution if your floor has any significant cracks. Clean any oil residues, check for moisture. Smooth and level patched areas to ensure a uniform surface ready for coating.
-
Tape Off: Protect walls and trims with painter's tape. Once your epoxy cures, it'll be a hassle to clean up any errors. Get it right the first time through and be thorough!
-
Apply Primer or Base Layer: Your first layer is the foundation for the rest of your project. When you prepare properly and take your time on the first layer of your system, it builds momentum for the rest of your epoxy resin system.
- Cure: This is the primary reason you want to dedicate two days to this project. Your first layer needs to be your strongest, so let it cure overnight and allow it to build the strongest adhesion possible with your prepared concrete foundation.

Day 2: Epoxy Application (6-12 Hours)
-
Epoxy Resin Set Up: Organize your mixing buckets, epoxy cans, and tools in advance to ensure a smooth application. Proper setup prevents confusion and helps maintain accurate mix ratios and working time.
-
Mix Resin: Don't rush this! Follow the instructions provided in the kit. Most often, you'll just be mixing appropriate proportions of parts A and B. Don't let its simplicity lull you, though. Any improper mix could, and most likely will, threaten the integrity of the final cure. A product rep will be able to properly guide you if necessary.
-
Epoxy Resin Coat: Pour, spread with a squeegee, then use a suitable paint roller or even coverage.
-
(Optional) Add Flakes or Quartz Sand: While the epoxy is still wet, broadcast polymer flakes or quartz sand for texture and slip resistance. Polymer flake flooring is highly recommended for garage floors.
-
Cure: Check with your epoxy resin kit's manufacturer's guide to see how long you need to let your resin cure before moving on to the final topcoat.
- Top Coat: Apply clear polyaspartic for UV protection (prevents yellowing). Remember that polyaspartic resin cures faster than epoxy, typically in 2-8 hours, depending on the specific solution.
Avoid Common DIY Disasters: Basic Tips and Tricks
Epoxy resin is a remarkably flexible solution compared to alternatives, but that doesn't mean there aren't a few key points of failure to be aware of. Luckily, epoxy's weaknesses are often easy to account for.
First up is moisture. Whether you live in a humid climate or not, apply early morning to avoid midday heat, which speeds up curing time. There are several methods for resolving moisture issues. For guidance, refer to our moisture control guide or contact our technicians for personalized advice.
Always wear VOC respirators; epoxy fumes overwhelm in enclosed spaces. Safety is too often overlooked in contractor work. Don't let that be your mistake, too!
Maintenance Made Simple: Keep Floors Like New
Epoxy resin famously does most of the work of maintenance for you - its sleek finish helps keep dust and grime from collecting. Its incredible strength and resistance will also prevent the majority of hazards from threatening your garage! That being said, we have a few basic tips that'll help you squeeze the most use and life out of your floors.
For most daily and weekly maintenance, a microfiber mop with warm water and a pH-neutral cleaner will suffice. Avoid acidic or harsh chemicals. Wipe up oil, chemicals, or other spills right away using a soft cloth and mild cleaner to prevent staining or damage. Sweep or use a vacuum with a brush attachment to clean hard-to-reach areas where debris may collect.
For thorough cleaning, use an auto scrubber or soft-bristle brush with neutral cleaner—ideal for high-traffic garages. Don’t use steel wool, hard brushes, or harsh pads that can scratch the epoxy topcoat. Reseal your flake floor every few years (if needed) to maintain its shine and durability.
And as with any finished floor, avoid scratches! Use rubber pads under heavy furniture, minimize the use of heavy machinery, and otherwise avoid any risks to your floor.
EpoxyETC, Epoxy Classes and You
Do you want to turn your weekend hobby into a career? EpoxyETC & Epoxy Classes is right by your side. Our goal is your success, every step of the way.
-
Premium Products: Our RockHard Epoxy (industrial-grade at DIY prices)
-
Expert Training: 5-day certification at Epoxy Classes (learn metallic finishes, marketing, troubleshooting)
-
Lifetime Support: Contact our experts for real-time project guidance, on or off the job.
Business Tip: Offer epoxy garages as "weekend specials" using our kits. We'll even help you calculate how much you'll need for your average job if you call our phone support! It's a great way to boost your bottom line with minimal effort.
Conclusion
Every contractor knows the first step in a successful epoxy flooring career is perfecting the garage renovation. Even if you're just a DIY enthusiast looking for a weekend project, the garage is the perfect playground. Enhance your skills and provide your garage with the long-term protection it deserves!
On or off the job, our technicians are on-call and at your service at (954) 287-3797! Product guidance or project advice, our only goal is your success. Check out our EpoxyETC online store for the best prices on high-quality flooring resources.


